


The universe is a big deal in this household. Space, and particularly the stars and planets, are an unfaltering special interest for Biggest. If I am honest, space has always held an unrivaled fascination for me too. I love learning about it, love reading, writing and watching Science Fiction. When I was around fifteen, I painted a map of the solar system onto our attic room wall without really consulting my parents first. Daddy’s greatest love, after his family, is probably Star Wars and May the 4th is fast approaching. Littlest reliably informs me that her favourite planet is Mercury, because it is the smallest. With all that in mind, I decided to create some biscuits that would thrill the whole family. These Chocolate Planet Cookies with Marble effect icing are perfect for space-lovers and…. well anyone who likes biscuits really.
They look really effective and would be a great addition to any spaced-themed birthday party or Star Wars Day celebrations.

Chocolate Planet Cookies
Makes: 30 large cookies. More if you use various sizes. You can halve the recipe to make a smaller batch
Ingredients:
- 400g plain flour
- 500g dark Muscovado sugar
- 2 eggs
- 180g cocoa powder
- 2 and 1/2 teaspoons baking powder
- 1/4 teaspoon salt
- 370g softened butter
You will also need round cookie cutters in various sizes.

For the Marble-effect Icing:
- 400g Icing sugar
- 75mls milk
- 1 Tablespoon golden syrup
- 1 teaspoon almond essence
- Food colouring. Gel colours give the most vibrant colours.
Chocolate Planet Cookies – Method
Cream the butter and sugar together until light and fluffy. Beat in the eggs, one at a time. Next, add the dry ingredients and mix together until the mixture starts to form a dough. You will probably need to start using your hands at this point – until the dough sticks together and becomes easy to knead. Shape the dough into one or two large balls and wrap with cling-film. Then, place in the fridge for one to two hours. This makes the dough easier to roll out and cut.
Preheat the oven 170 degrees, 190 for a fan oven or gas mark 5. Once the dough has chilled, roll out, using extra flour to make sure that it does not stick. The dough should be rolled out to around 8mm thick. You will probably need to do this in two sections if you made the full batch amount. Cut out circle shapes in various sizes. You can use cookies cutters or any round objects like plastic cups if you do not have cutters to hand. The full amount of dough will make a lot of cookies – perfect for a party or larger gathering.

Place the cookies on baking trays lined with baking paper and bake in the oven for 10-15 minutes. The cookies should be firm to the touch but not too dark in colour. Once cooked and slightly cooled, transfer to cooling rack to cool completely.
You are then ready to create the icing.
Marbled Icing
This can be really tricky to get right. Mix the syrup and a small amount of milk into the icing sugar. You should add the milk, a few teaspoons at a time, while stirring all the time. The icing needs to be exactly the right consistency – too thick and it will not cling to the cookies, too thin and it will run off. To test the consistency, spoon a small amount onto a spare cookie. The icing should flatten and settle a little without running off the sides
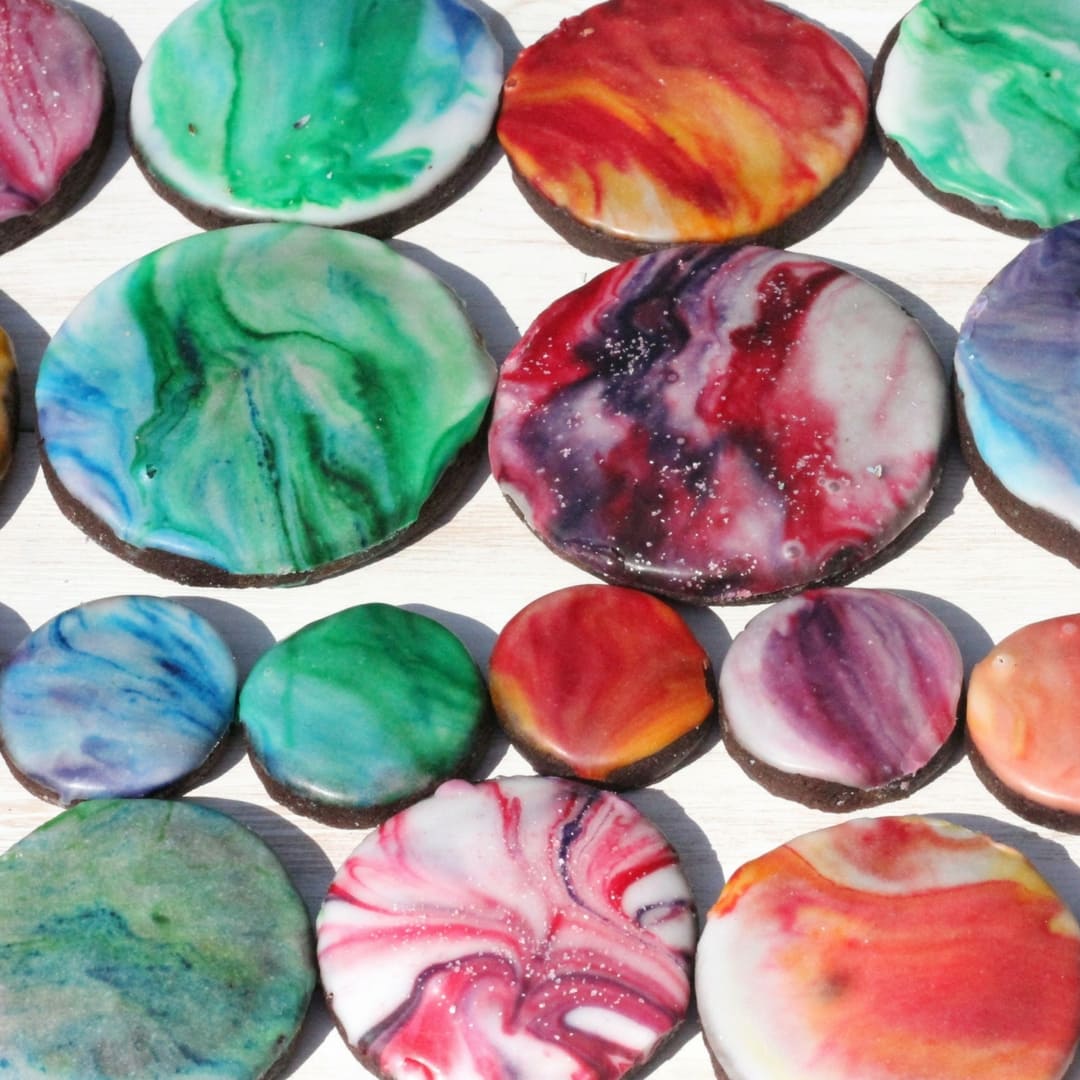
Once you are happy with the consistency, separate the icing into 3 or 4 different bowls for different colours. Using a toothpick, swirl in food coloured to create a marbled effect, like planets:

Repeat this for as many colours and designs as you would like.
Next, dip a cookie onto the surface of the icing and twist slightly to ensure the top is covered in icing Then, set to one side to harden. Choose different sized cookies and different colours and patterns to create a range of planets.
The cookies will need around half an hour to harden enough to eat. However, if you would like to store them, leaving them to harden for longer (an hour or two) before stacking will ensure the icing is kept pristine.
There you have it – Chocolate Planet Cookies to delight any space enthusiast.
We hope you enjoy them – and may the force be with you.

Please note, this post contains Amazon affiliate links. For more information see our Disclosure Policy.
If you enjoyed this post, you may also like:
Raspberry and White Chocolate Skyr Cake
Valentine’s Heart Cookies and Presentation Box

Perfect for holiday fun – learning and treats – always a winner here
Oh wow, these look great! My daughter would love to make these. They look so effective! Perfect for any budding astronaut!
I love this! But do you happen to have the recipe in customary units? I’m afraid that if I try to convert the measurements, I will mess it up!
Sorry, I don’t! Those are the customary units in the UK. What measurements were you looking for? Cups? 😊