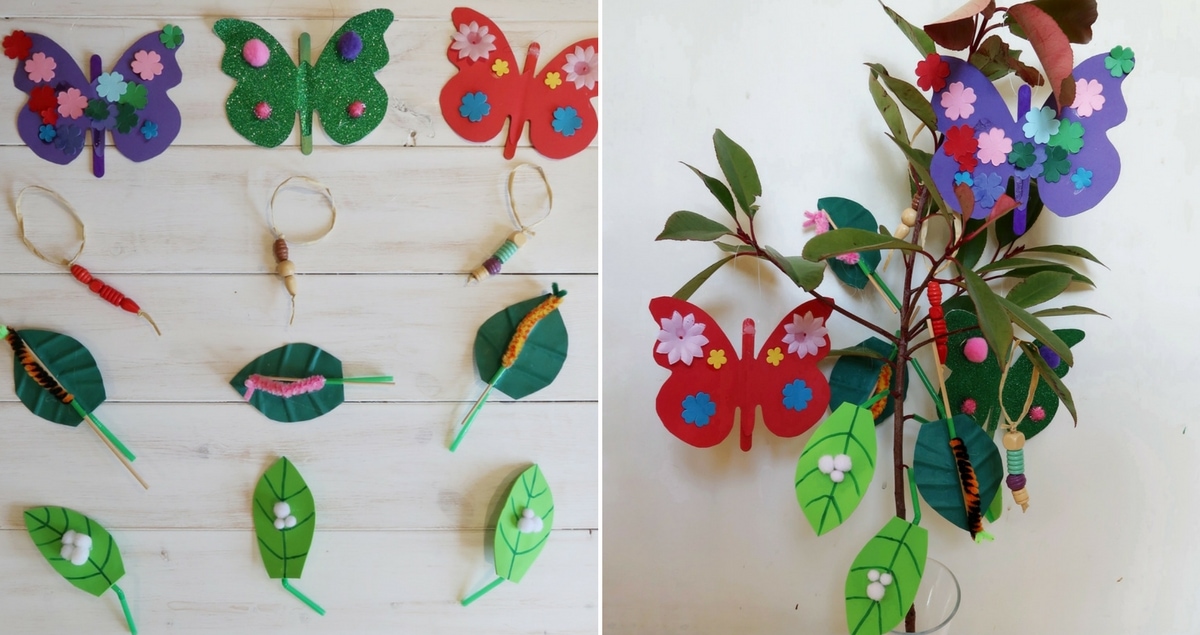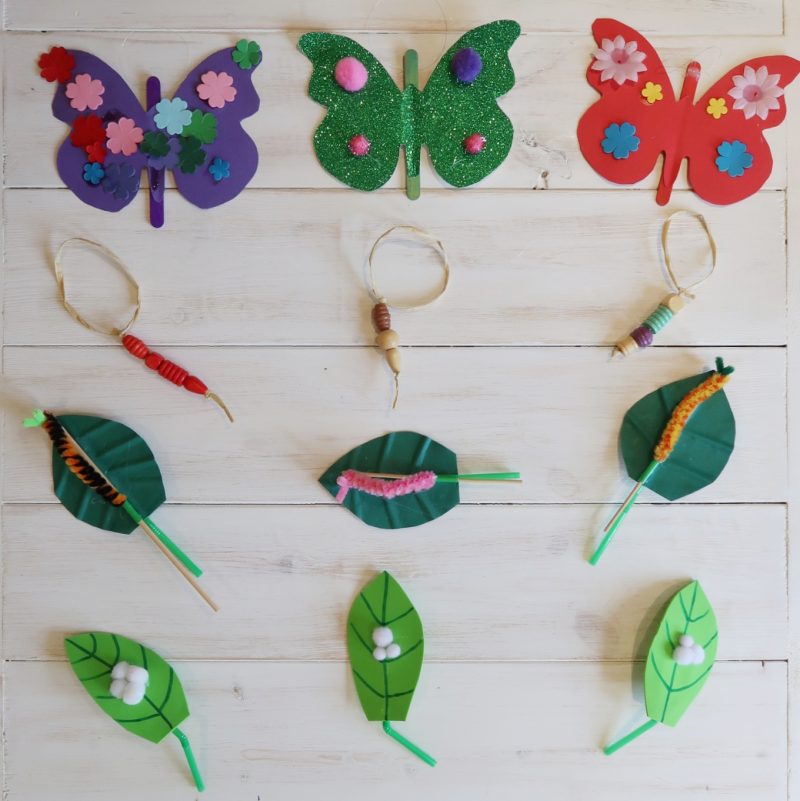
This month’s Bostik Blogger theme was nature. Our life cycle of a butterfly craft tree is actually four crafts in one. The children helped me to create a tree with all the life stages of a butterfly included. Not only did we have fun making them and decorating our tree, we also had the opportunity to talk about how a butterfly begins its life and learn about nature.
We made four separate bug crafts for our tree – the egg or ovum, the larva or caterpillar, the pupa or chrysalis and finally the adult butterfly. And the caterpillars actually move!

Life Cycle of a Butterfly Craft Tree
Materials:
A large twig, or small plant. Alternatively you could decorate a tree in an outside space
For the eggs:
- Green craft foam
- White pom poms
- Green permanent marker
- Glue
- Scissors
For the caterpillars:
- Coloured pipe-cleaners
- Green card
- Green drinking straws
- Wooden skewers or cocktail sticks
- Glue (a hot glue gun works best for some parts here)
- Scissors
For the chrysalises:
- Sturdy string or yarn
- Multi-coloured wooden beads
For the butterflies:
- Coloured card
- Lolly sticks
- String or nylon yarn
- Pom poms, sequins etc. for decoration
- Half butterfly shape in card or foam to draw around
- Scissors

Method:
Eggs
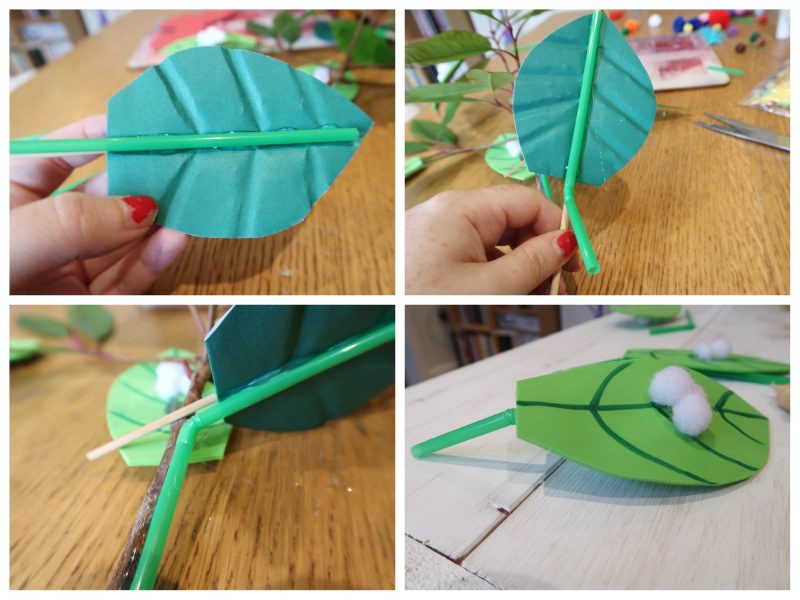
For the leaves with eggs, simply cut out a green foam leaf shape and draw on a leaf pattern with a green permanaent marker. I then let the children stick their white pom pom ‘eggs’ to the leaves. Finally, I glued a length of drinking straw to the underside of each leave. This creates a stalk and gives you a method to attach the leaves to a tree or plant by placing the straw over a twig –

Caterpillars
For the caterpillars, we used green card and pressed the leaf pattern onto it using wooden skewers. To create a caterpillars that seem to move and wiggle about, we started by winding coloured pipe-cleaners around the skewers in order to create a fatter ‘spiral’ that looked more like a caterpillar. Next, we attached a shorter length of drinking straw to the bottom of the leaf to act as a guide for the wooden skewer. Finally, we glued the front of the caterpillar to the front of the skewer and the other end to the top of the drinking straw. Make sure that you have fed your wooden stick through the straw before you begin! The method is a little clearer in the pictures below:

When you pull on the stick, your caterpillar will then seem to curl up and look like it is crawling. We also added short lengths of pipe-cleaner as antennae. Next, I added drinking straws to the underneath, as with the egg leaves, in order to create an easy way to attach them to our tree.

Chrysalises
The chrysalises were very straightforward. We simply threaded colourful beads onto some fairly sturdy and thick string. This is a great activity for developing children’s motor skills, as placing the beads onto the string can be quite tricky. Finally, I tied the string in a loop at the end so that we could hang them from our life cycle of a butterfly craft tree.

Butterflies
To make the butterflies, we used a foam stencil to cut out butterfly shapes in different colours. I glued the shapes to lolly sticks to make them more sturdy and added a nylon string loop for hanging them on the life cycle of a butterfly craft tree. I did this with the hot glue gun and, once dry, I handed the shapes over to the children to decorate however they saw fit.

Finally, the last step in creating our tree was to decorate it with our creations. We were crafting on a fairly miserable day and so I used some trimmings from one of the bushes in our garden. On a nicer day, we may have taken the activity outside. Here is our final tree:

You could adapt this task to show the life cycle and metamorphosis of other creatures, such as bees or frogs.
You can find more crafts here:
Changeable Bird and Insect Mobile Craft

Please note, Bostik send us craft items every month in order for us to take part in the monthly #BostikBlogger craft Challenge.


