Halloween and Bonfire night are over. The clocks have changed and the nights are drawing in. Finally, we can start planning for my favourite time of year – Christmas. Some may think it is still a little early but bloggers are always working several weeks ahead of time. So, this week, as soon as the spooky decorations were put away and the whizzes and bangs died down, I settled down to making Christmas ornaments, eating mince pies and listening to the Michael Bublé Christmas album; I do not regret a second of it! Of course, the Bostik Blogger theme for November is Christmas. I have been making these DIY Christmas Tree Ornaments, using craft twigs and buttons. They look effective and are really simple to make. Read on to find out how.

DIY Christmas Tree Ornaments – You will need:
- Craft twigs
- Buttons (you can buy them in bulk for crafts)
- Silver marker
- Scissors
- Craft knife
- Craft gems/sequins
- Ribbon/Mixed ribbon cut-offs
- Glue gun and hot glue
- Bostik Fine and Wide Glue Pen
- String

DIY Christmas Tree Ornaments – Method
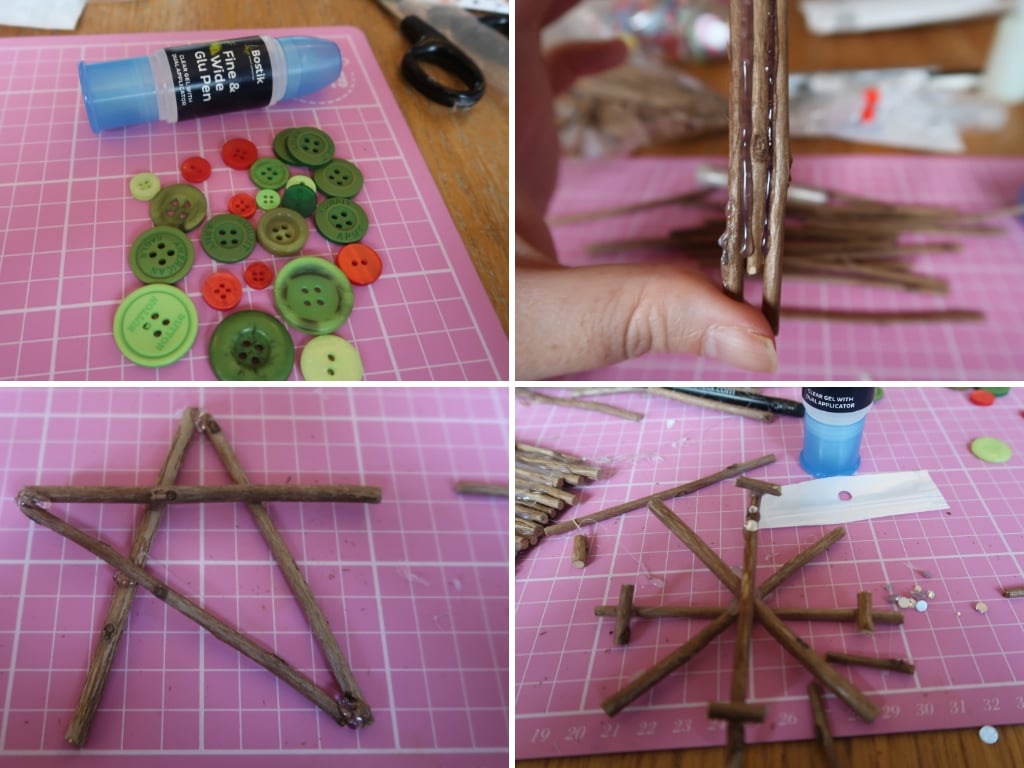
The first task is to make the Christmas shapes from craft twigs. I chose to make four different shapes – a Christmas tree, a star, a snowflake, and a present. You will need to trim the twigs to the right sizes, using a craft knife. If you chose to make silver decorations, you will also need to colour the twigs using a silver marker pen. You can find all the exact items I used linked in the list above. Once you have twigs of the right sizes, you will need to glue each shape together using hot glue. This stage really does need the hot glue, as conventional glue is not strong enough and takes too long to set.

For the tree, you will use one thick twig as the trunk and cut several smaller twigs, getting smaller in size, for the triangle of a tree shape. The star requires 5 sticks of equal length, arranged into a five-point star. The present is simply a square of twigs with a cross in the middle to imitate a bow. Finally, the snowflake is four sticks arranged as spokes, with a few smaller twigs cut for snowflake details. Secure all of the shapes by using hot glue on the joins.

Once the shapes are completely dry, you can begin to decorate them. I used a Bostik Fine and Wide glue pen for this, as it is a bit tricky to press down small decorations when using hot glue. For the natural twig shapes, I used a selection of craft buttons for decoration. The silver shapes were decorated using small craft gems. You can choose to keep to a colour scheme, or use a mixture. You could also use other decorations like sequins, feathers, beads, glitter – whatever you like really!
Finally, once the shapes are decorated as you would like, and dry, you can add a loop of string to hang them by. Again, I used hot glue for this part. I tied a loop and then glued it to the back top of each shape.
DIY Christmas Tree Ornaments Suit any Theme
These DIY Christmas Tree Ornaments are simple to make and could suit and theme or colour scheme. You could make several of one shape, paint them different colours, or use different decoration techniques to make them your own. I certainly had great fun making them.
If you enjoyed this craft, you may also like:
Christmas Sensory Bauble Craft
Happy Crafting.

Please note, this is a paid collaboration with Bostik. Some of the links included are affiliate links. This means if you click-through and buy something we may earn a small commission at no cost to you. Please see our Disclosure Policy for more information.


