


 Please note, this post contains affiliate links. This means if you click-through on some links and buy products, we may earn a small commission at no cost to you.
Halloween is nearly upon us again and it looks like it may be a little different this year. Covid 19 means that trick or treating is certainly a no-go and many children will feel bitterly disappointed by this. However, just because we cannot go trick or treating, it doesn’t mean we can’t fill Halloween with other kinds of spooky fun. This DIY Halloween wreath will add a lovely touch to Halloween decorations and it is something the kids will enjoy helping to make too!
DIY Halloween Wreath – Materials Needed
- Tissue paper in autumn leaves colours
- PVA Glue
- Cleat plastic bag or sheet
- Rattan wreath
- String or silver thread
- Polymer clay
- Hot glue and glue gun (optional)
- Plastic spider
- Cobweb decorations
- Ribbon
- Scissors
- Craft/florist wire (small length)
- FREE Leaf Template
- Gold/craft leaves (optional)
DIY Halloween Wreath – Leaves
Firstly, you will need to make some think layers of tissue paper papier-mache which we will later make into autumn leaves. Tear red, orange, yellow, pink and green tissue paper into small pieces. Next, cover a plastic zip lock bag of plastic sheet in a think layer of PVA glue and water mixed together. About half water to PVA works well. Create a pattern of colours by sticking down small strips of tissue.

Once you have finished one layer, cover with glue and stick the second layer of tissue, making sure to cover all gaps. We do not need our leaves to be too thick, so 3-5 layers of tissue paper should be plenty. Kids love getting involved in this part and there is no wrong way to stick down the tissue paper so they can help lots with this part!
Once the tissue paper is dry (leave overnight) you can cut out leaf shapes. You could freestyle with your own shapes or use our Free Leaf Shape Template. I also added a few gold craft leaves that I had leftover from another project. Once they are complete you can arrange them and stick them down on your DIY Halloween Wreath.
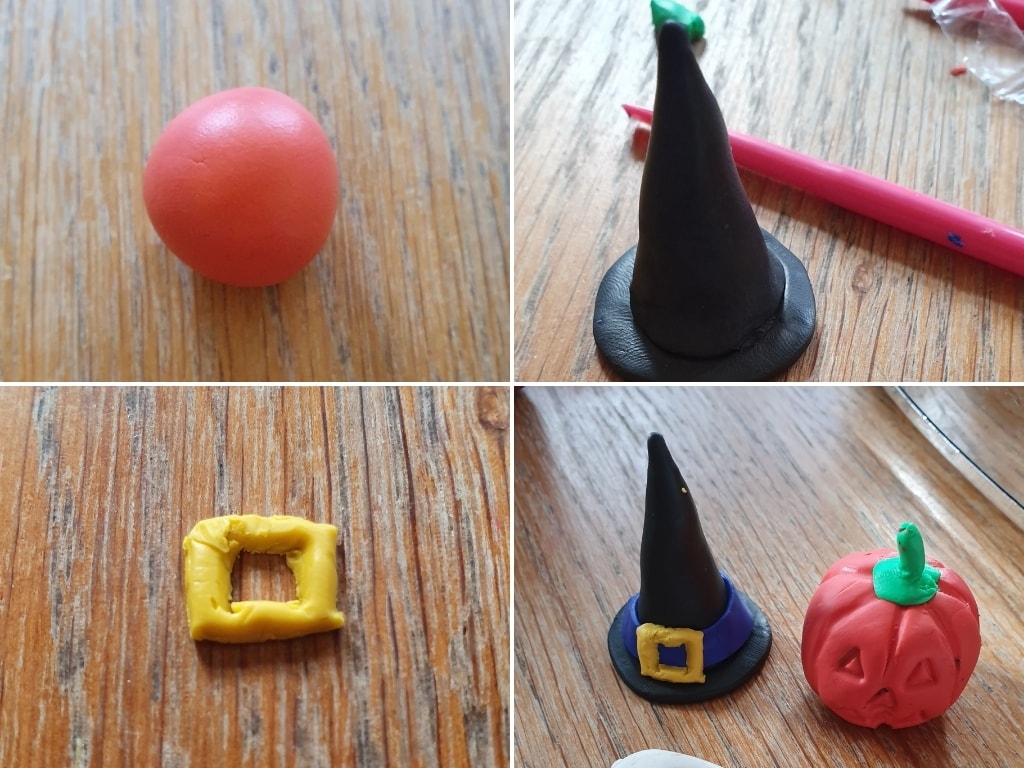
Polymer Halloween Decorations
While the tissue paper is drying, you can get started on some other elements. I made some spooky little ornaments from polymer clay to add to my wreath.
I made a small Pumpkin from a sphere of orange clay and a witches hat from a cone and a circle of black clay. For finishing touches, I added a carved pumpkin face and a buckle. Children can also have great fun making spooky little decorations, like ghosts, spiders, skeletons and anything else!
The clay only takes around Twenty minutes or so to set in the oven.
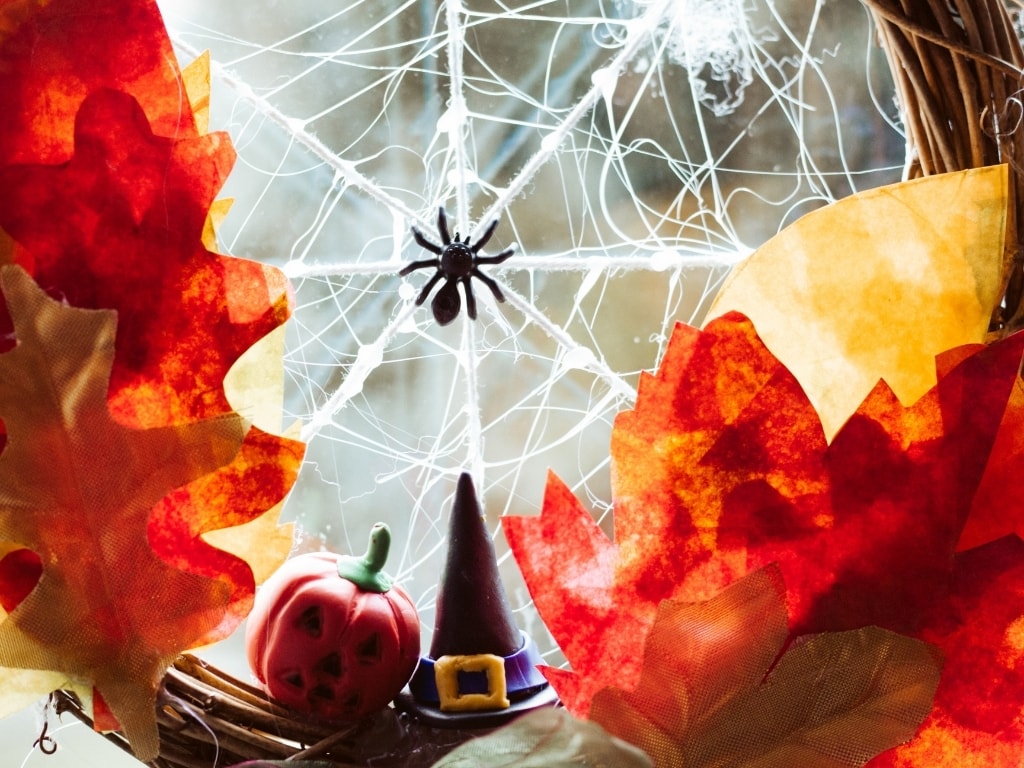
Halloween Wreath with Spider’s Web
To create the web in the middle and general cobwebs, I used a glue gun and some fake cobwebs. Firstly, I glued on silver thread ‘spokes’ in the centre of the wreath. I used six lengths of string to create the effect of a spider’s web. Next, I used the hot glue to create spirals that went from spoke to spoke.
Take care with this part! The glue is very hot and you will need to protect your hands and the surface underneath.

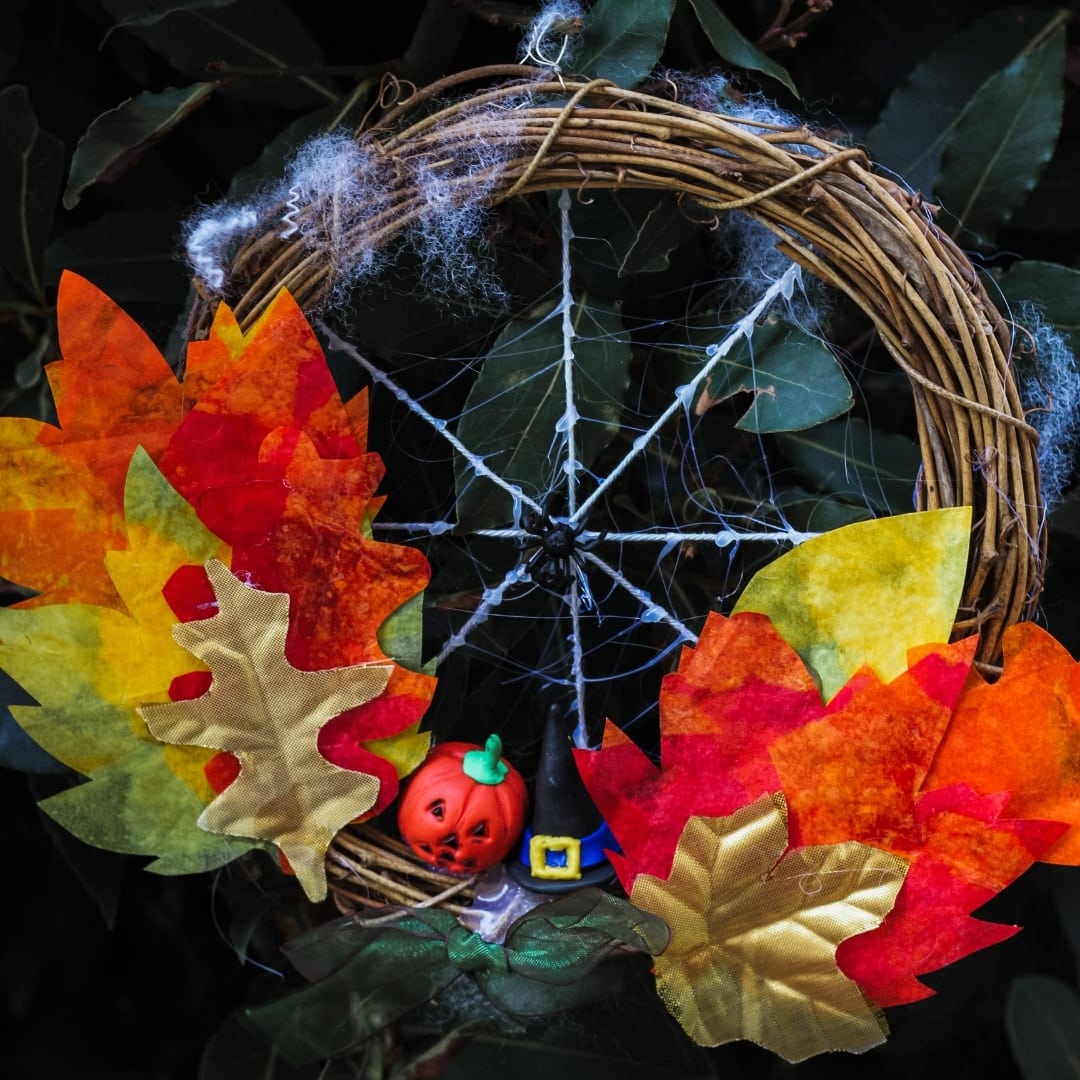
Putting the Wreath Together
The final step in creating your DIY Halloween Wreath is to add all the elements together. Stick or pin on your decorations and leaves. I put my decorations in the centre and leaves either side. However, you can be creative and arrange them however you would like.
I stuck a plastic spider in the centre of my web and draped a few extra cobwebs around to finish in all off. Finally, I added a ribbon and a small loop of wire at the top to make it easy to hang.
And there we have it – the perfect spooky decoration to add a bit of Halloween fun to your house. If you enjoyed this Halloween craft project, you may also like:
